Customise the interest form flow
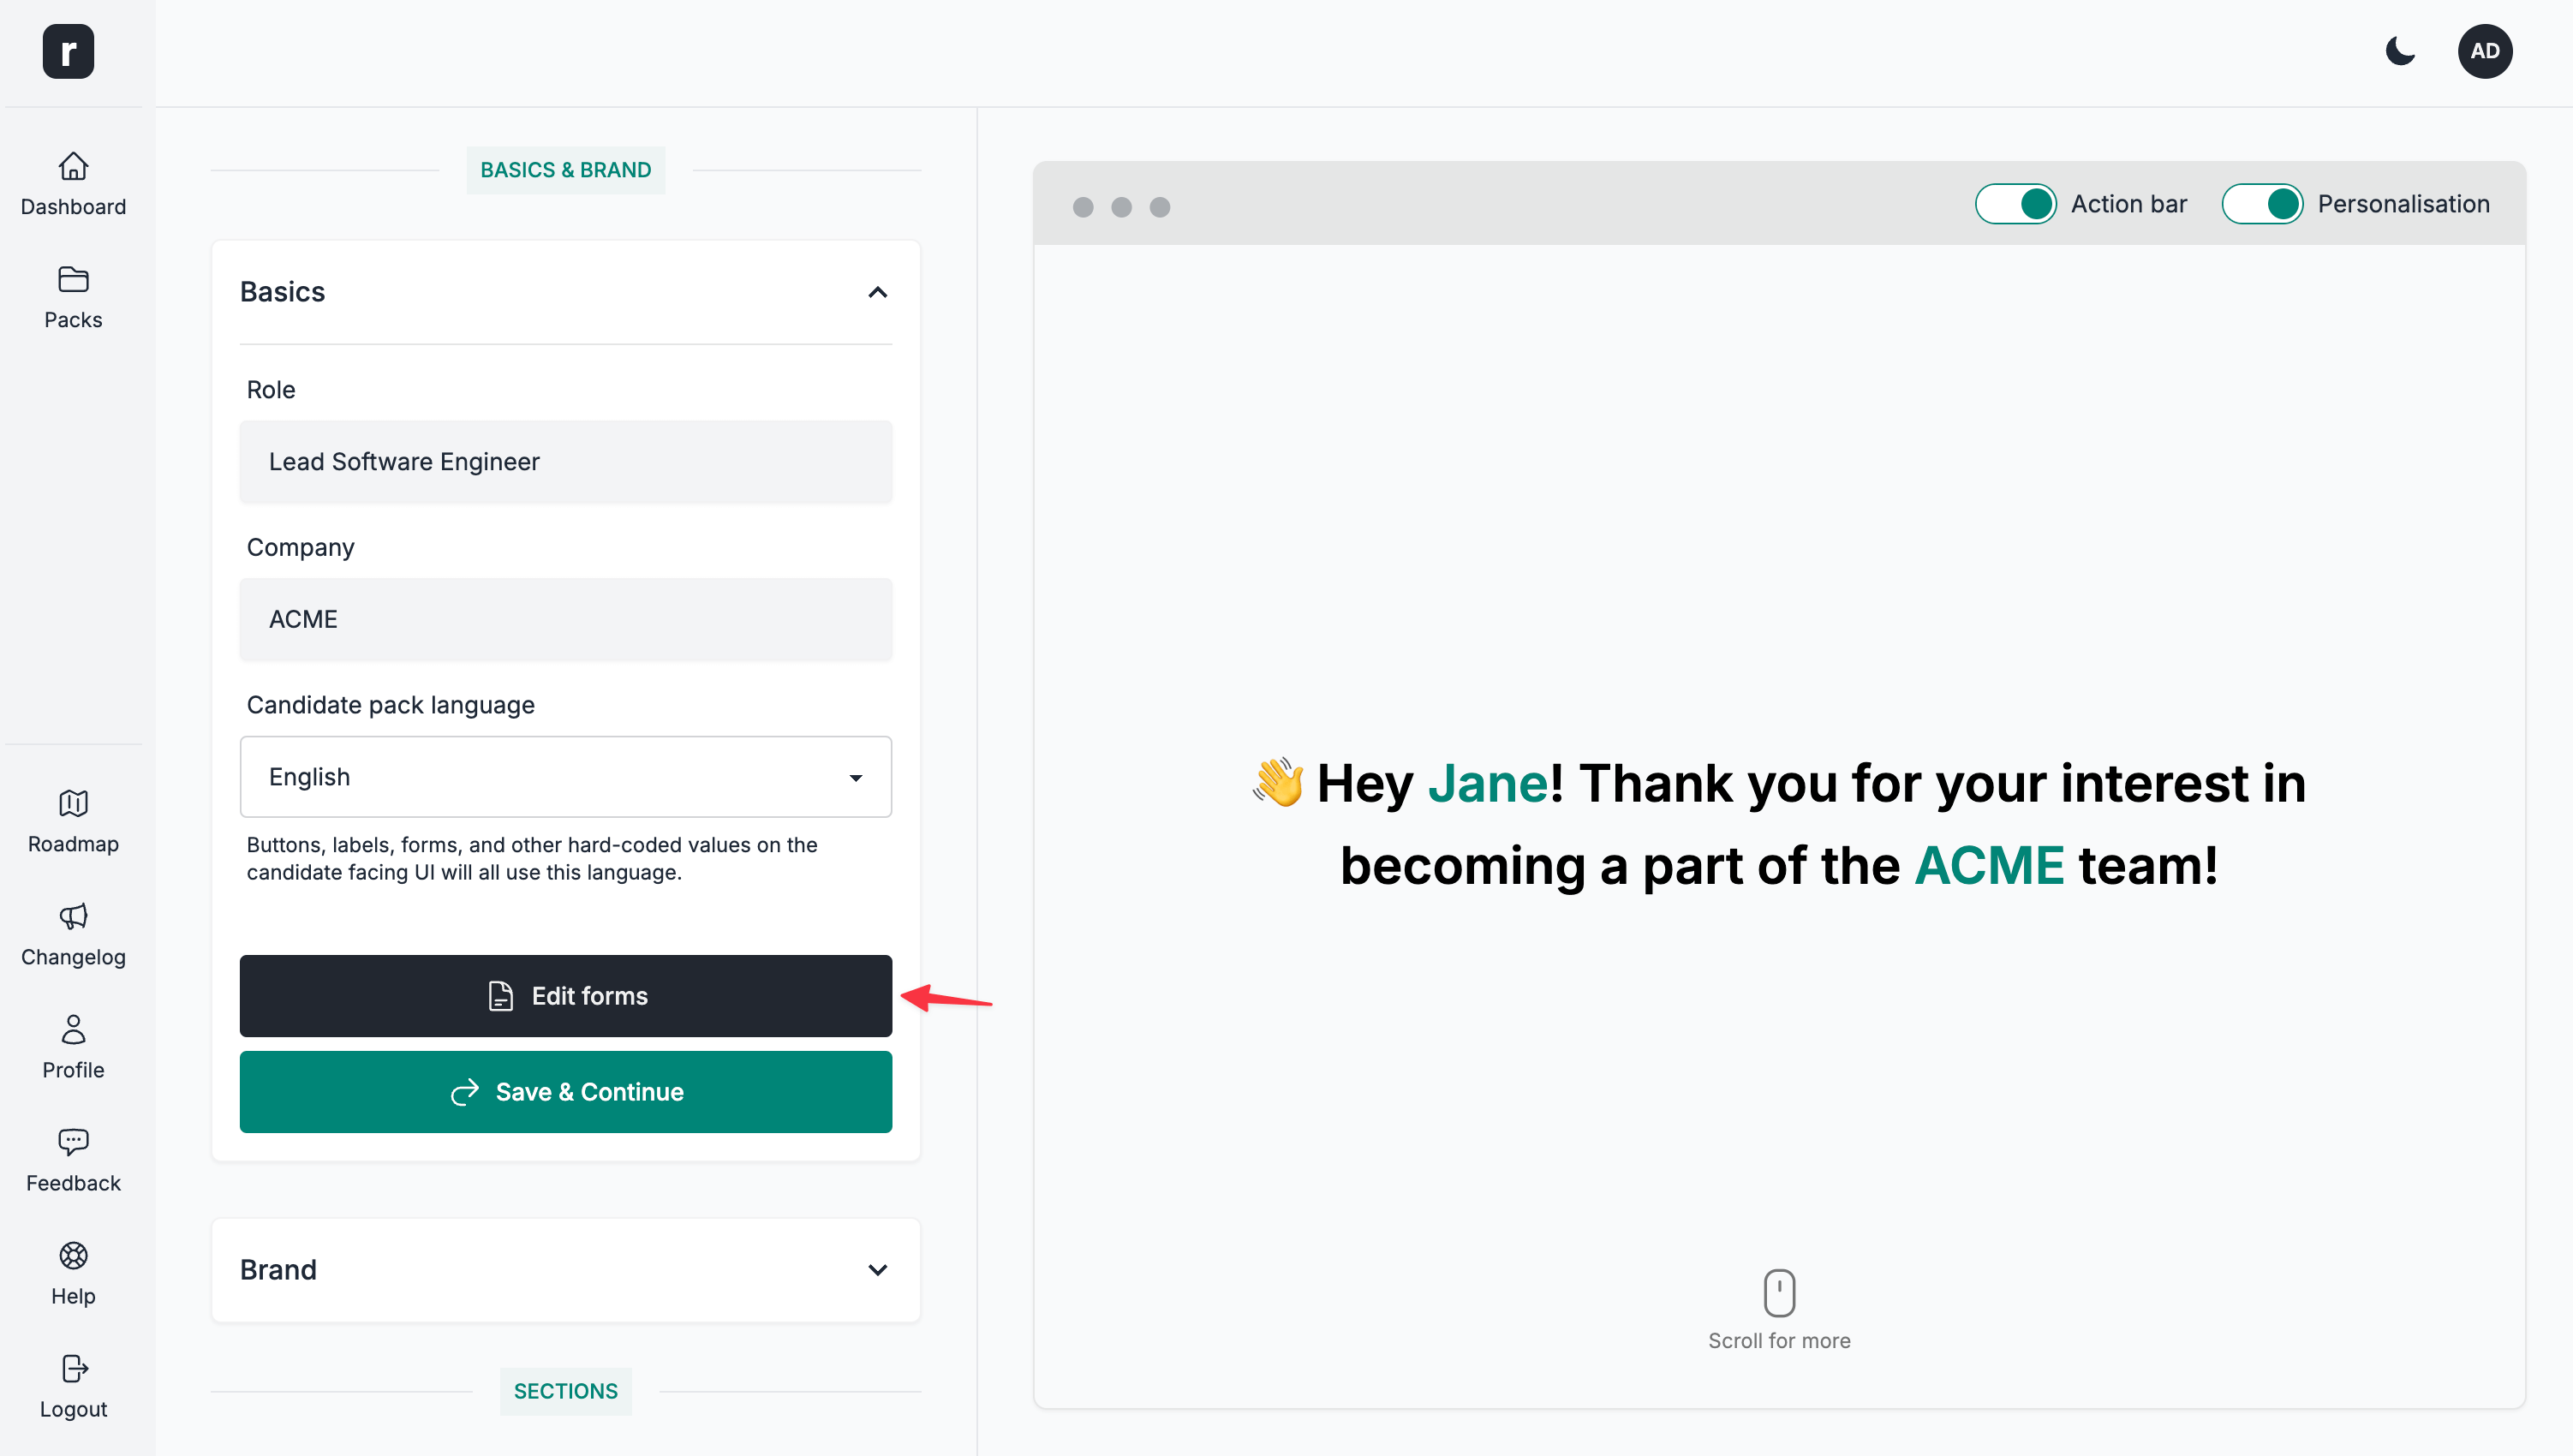
You have the option to customise the behaviour of the I'm interested button on the public candidate pack page in multiple ways. To reach the forms editor, go to a candidate pack editor page and click the Edit forms button under the Basics section.
Once on the Form Editor, make sure you are on the Interest form tab.
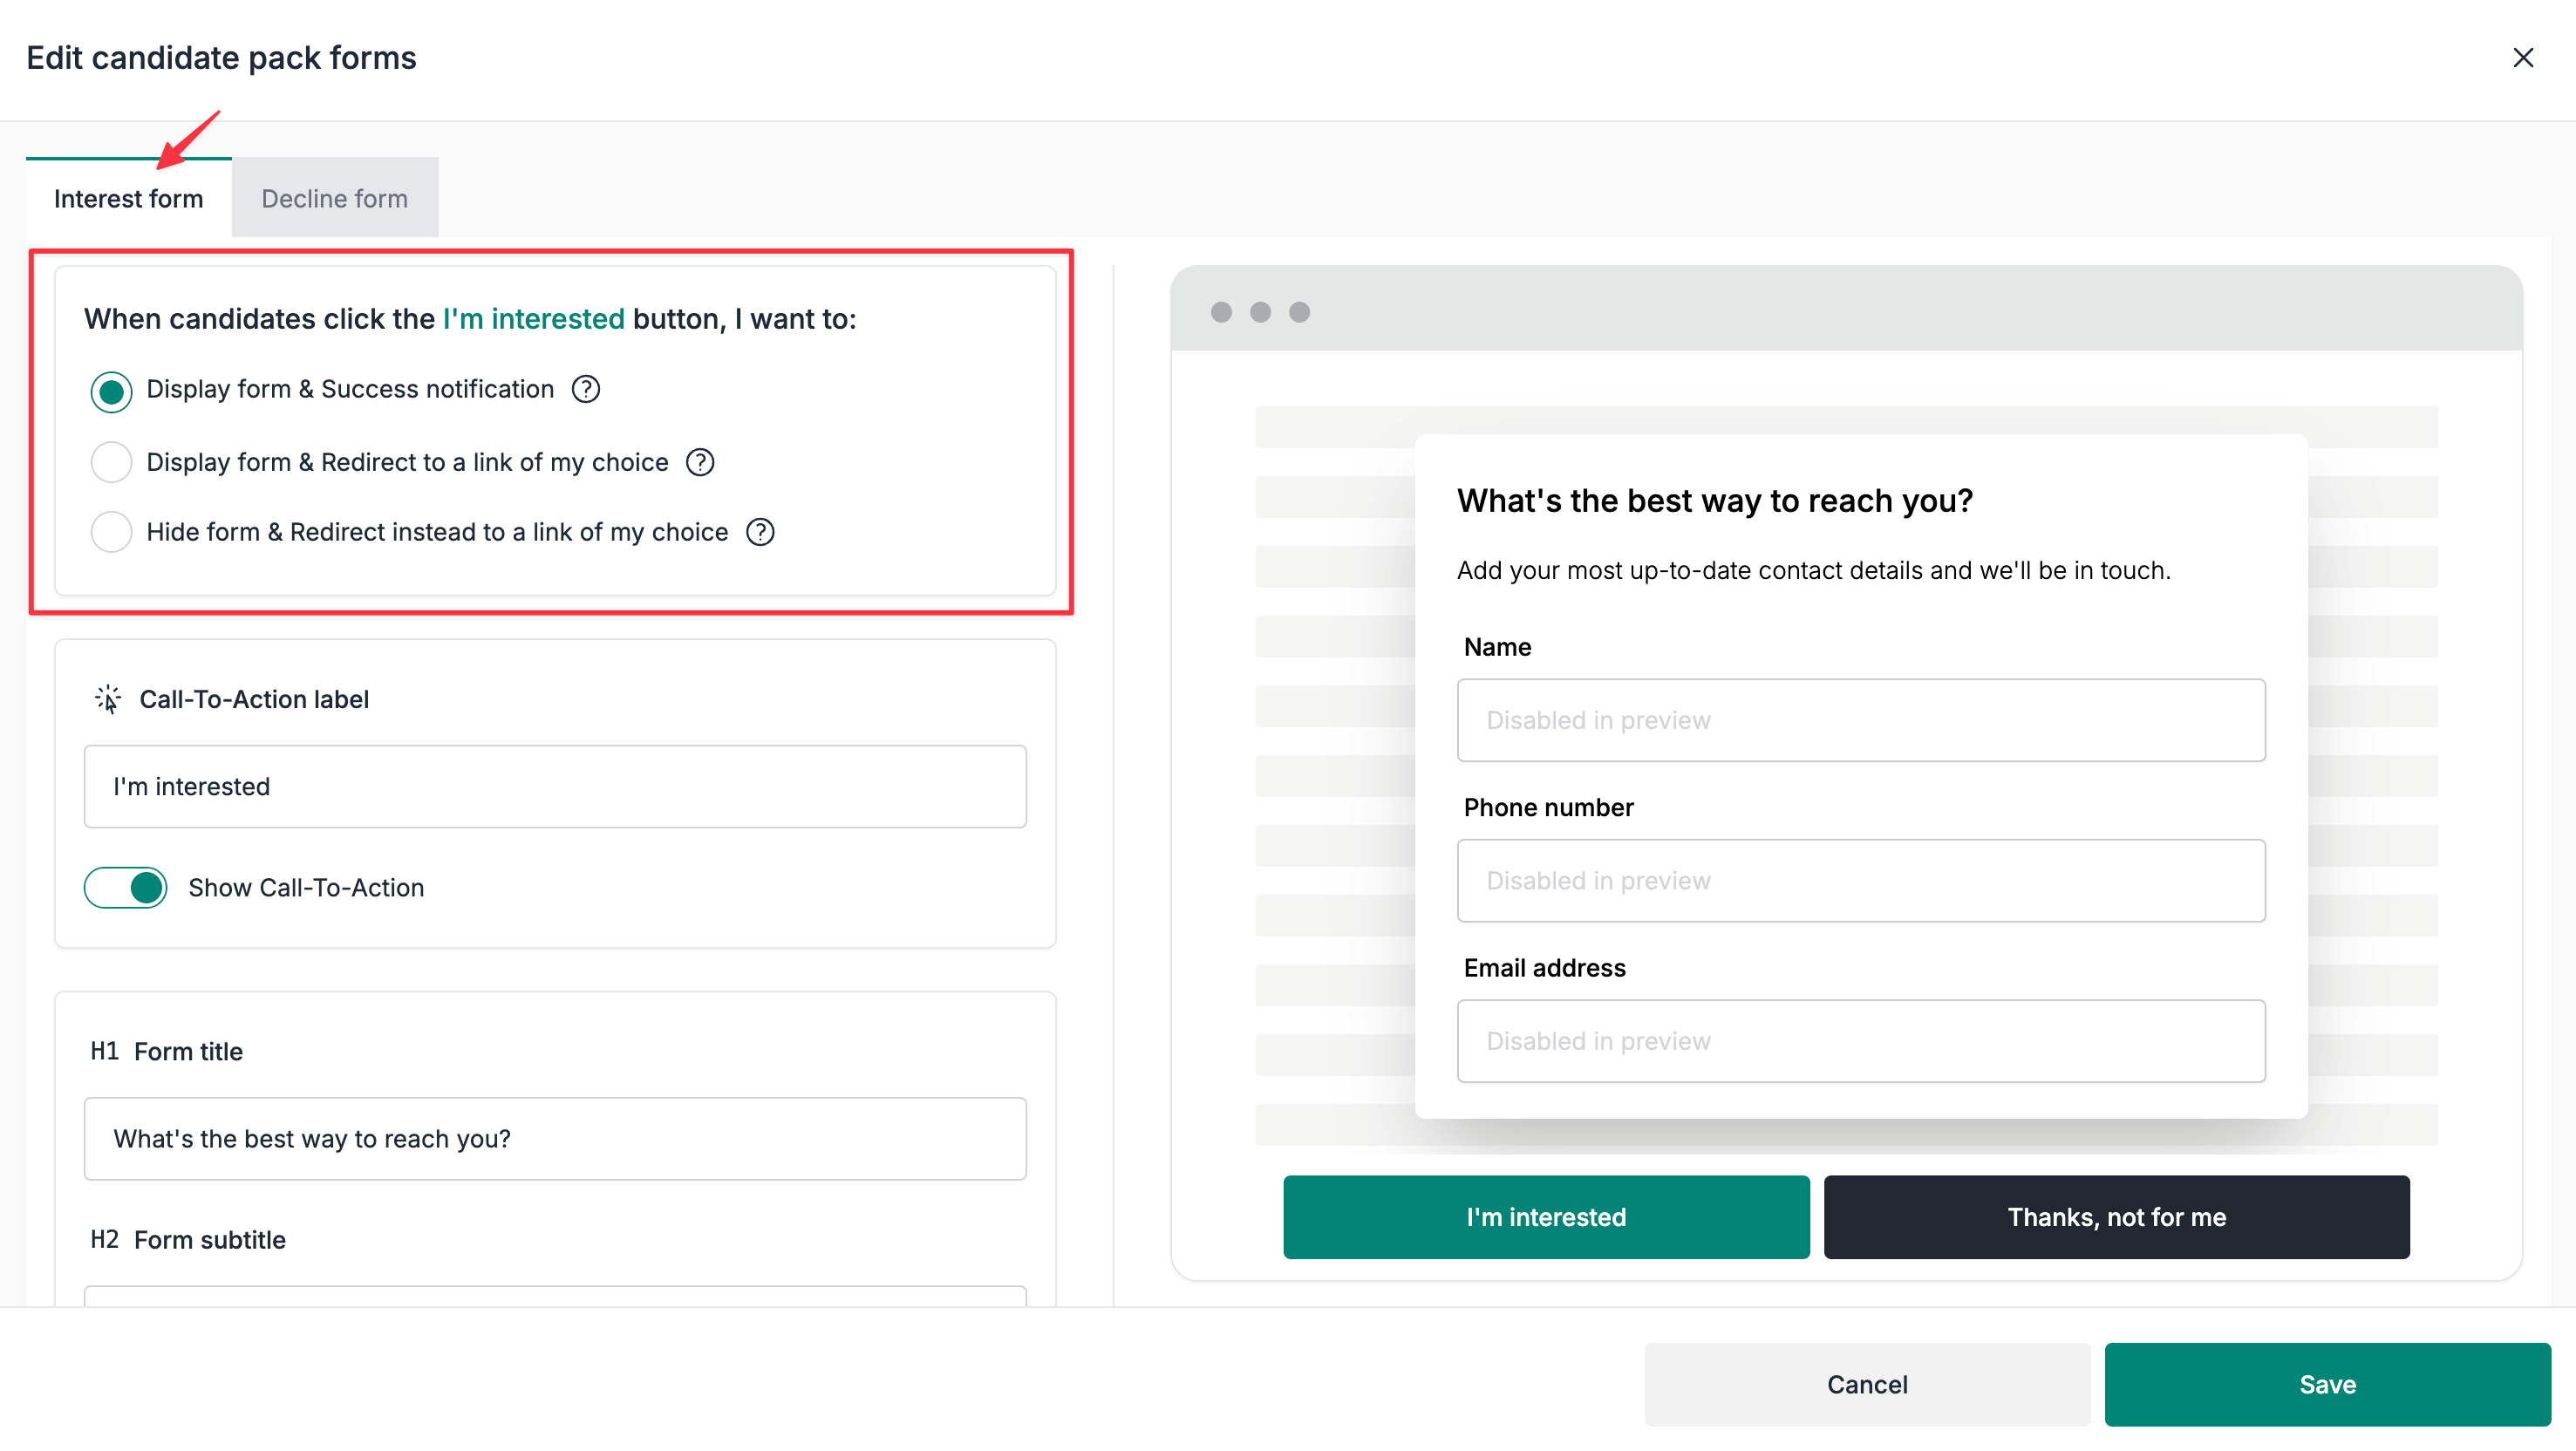
Customising the interest form flow
1. Display form & Success notification
How this flow works?
- Candidates click the
I'm interestedbutton - A data collection form is displayed
- Candidates complete the form
- A success notification is shown to the candidates
If email notifications are enabled for this candidate pack when the form is submitted, the form data is sent to the main email address configured for this candidate pack and any additional recipients configured for it. All of these addresses must belong to active team members. If email notifications are disabled, no notification email is sent; this may differ from the email address used to register on Role.so.
2. Display form & Redirect to a link of my choice
How this flow works?
- Candidates click the
I'm interestedbutton - A data collection form is displayed
- Candidates complete the form
- Upon successful completion of the form, candidates are redirected to a link of your choice
If email notifications are enabled for this candidate pack when the form is submitted, the form data is sent to the main email address configured for this candidate pack and any additional recipients configured for it. All of these addresses must belong to active team members. If email notifications are disabled, no notification email is sent; this may differ from the email address used to register on Role.so.
3. Hide form & Redirect instead to a link of my choice
How this flow works?
- Candidates click the
I'm interestedbutton - No form will be displayed
- Instead, candidates are redirected to a link of your choice
Since we are bypassing the data collection form and instead redirect the candidates to a link of your choice, there will be no emails sent to your email address.
Add custom screening questions
In the Custom questions section of the Interest form tab, click Add question. Choose Short text, Long text, Single choice or Multiple choices, then enter your question and, for choice questions, its answer options. Choice questions need at least two distinct, non-empty options. Enable Required if the candidate must answer the question.
You can add up to 10 custom questions in total, including questions that are hidden for some candidates. If the section is locked, your team needs access to custom questions before you can configure them. Custom questions apply to flows that display the interest form; they are not displayed when you hide the form and redirect candidates instead.
Show a question based on a previous answer
Conditional questions let you ask for more detail only when it is relevant to a candidate. For example, ask about a notice period only when the candidate says they cannot start immediately.
- Add the question “When are you available?” with the type
Single choiceand the options “Immediately” and “After a notice period”. LeaveShow this questionset toAlwayson this question. - Add “How long is your notice period?” after it. This follow-up can use any of the four question types.
- On the follow-up question, change
Show this questiontoWhen an answer matches. - Under
Previous question, select “When are you available?”. The source must be an earlier, always-visible choice question. - Select “After a notice period” as the
Answer. A single-choice source usesIs equal to; a multiple-choice source usesContainsand shows the follow-up when the selected answers include that option. - Test the different answers in the preview. Advance to the questions step to try the conditions. On smaller screens, open
Previewto reach the preview. - Click
Saveto save the configuration. Answers entered in the preview are for testing and do not create an application.
Examples
- Availability: “When are you available?” → “After a notice period” → “How long is your notice period?”
- Location: “Where do you currently live?” → “Outside France” → “Are you willing to relocate for this role?”
- Skills: “Which technologies do you use?” (multiple choices) → React is selected → “Describe your experience with React.”
How conditions behave
- Until the candidate answers the source question, the follow-up stays hidden.
- A question marked
Requiredis required only when it is visible. - If the candidate changes an answer and a follow-up becomes hidden, its previous answer is cleared and is not submitted. If it appears again, the candidate must answer it again if it is required.
- Each question supports one condition with one triggering option. You cannot combine several conditions or use a conditional question as the source of another condition.
- If you delete the source question or its triggering option, move the source after the follow-up, or change the source to a text question, the editor asks you to repair the condition before saving. Choose a valid source and answer, or set
Show this questionback toAlways.
Keep follow-ups focused on information you need for the role, and test both matching and non-matching answers before saving.
Custom links
When using custom links, you can use any 3rd party link of your choice: Calendly, LinkedIn, Workable or any other ATS of your choice.